Flutter×Amplifyでモバイルアプリケーションを開発しており、ソーシャルログインの実装手順を当記事に記載する。以下の公式ドキュメントの手順通り進めれば8割型完了するが、不足している点もあるため忘備録として残す。
Social sign-in (OAuth): https://docs.amplify.aws/lib/auth/social/q/platform/flutter/
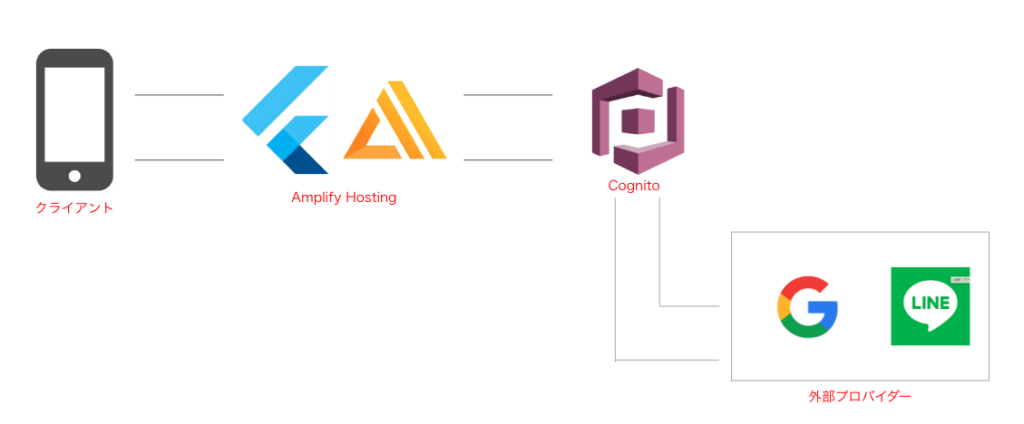
ざっくりだが、アーキテクチャはこんな感じ。
基本設定
この章での設定内容は、ソーシャルプロバイダーに関係なくどの工程でも共通で実施する。
認証プロバイダーの設定
以下の通りに実施する。
https://docs.amplify.aws/lib/auth/social/q/platform/flutter/#setup-your-auth-provider
Amplifyの設定を更新
amplify update authを実行し、以下の手順で進める。
? Do you want to use the default authentication and security configuration?
    `Default configuration with Social Provider (Federation)`
? How do you want users to be able to sign in?
    `Username`
? Do you want to configure advanced settings?
    `No, I am done.`
? What domain name prefix you want us to create for you?
    `(default)`
? Enter your redirect signin URI:
    `myapp://`
? Do you want to add another redirect signin URI
    `No`
? Enter your redirect signout URI:
    `myapp://`
? Do you want to add another redirect signout URI
    `No`
? Select the social providers you want to configure for your user pool: Google(使用するプロバイダーを選択する)
amplify pushを実行し、変更を反映する。
デプロイが完了したら、amplify statusを実行することで設定内容を確認できる。
プラットフォームのセットアップ
iOS
プロジェクトの以下のファイルを編集する。
ios/Runner/Info.plist
以下の…で囲まれた部分のコードを追記する。
...
	<key>CFBundleURLTypes</key>
	<array>
		<dict>
			<key>CFBundleURLSchemes</key>
			<array>
					<string>myapp</string>
			</array>
		</dict>
	</array>
...
</dict>
</plist>
この設定は、アプリケーションがカスタムURLスキーマをサポートしていることを示す。ソーシャルログイン(例:GoogleやFacebook)のような外部サービスを使用してユーザーを認証するときに、認証が完了した後にユーザーをアプリに戻すためのリダイレクトURLとして使用することができる。
Android
android/app/src/mainに以下の記述を追記する。
<queries>
    <intent>
        <action android:name=
            "android.support.customtabs.action.CustomTabsService" />
    </intent>
</queries>
<application>
  ...
  <activity
        android:name=".MainActivity" android:exported="true">
        <intent-filter>
            <action android:name="android.intent.action.VIEW" />
            <category android:name="android.intent.category.DEFAULT" />
            <category android:name="android.intent.category.BROWSABLE" />
            <data android:scheme="myapp" />
        </intent-filter>
  </activity>
  ...
</application>
参照: https://docs.amplify.aws/lib/auth/social/q/platform/flutter/#platform-setup
処理実行
上記の設定が完了したら、ウィジェット側から以下のロジック(Amplify.Auth.signInWithWebUI)をCallすればGoogle認証機能が利用できる。
/*
  ソーシャルサインイン
  @param provider
  以下の外部サービスの認証を可能にする
  google、facebook、amazon、apple、twitter
*/
Future<SignInResult> socialSignIn(AuthProvider provider) async {
  return await Amplify.Auth.signInWithWebUI(
    provider: provider,
  );
}
Google認証
Google認証を実行するにあたり、注意すべきポイント。
認証プロバイダーの設定
以下の通りに実施する。
Google Sign-in: https://docs.amplify.aws/lib/auth/social/q/platform/flutter/#setup-your-auth-provider
Google developer consoleでCognitoドメインを設定する
Google developer consoleでプロジェクトを作成または選択し、「認証情報」タブを選択。
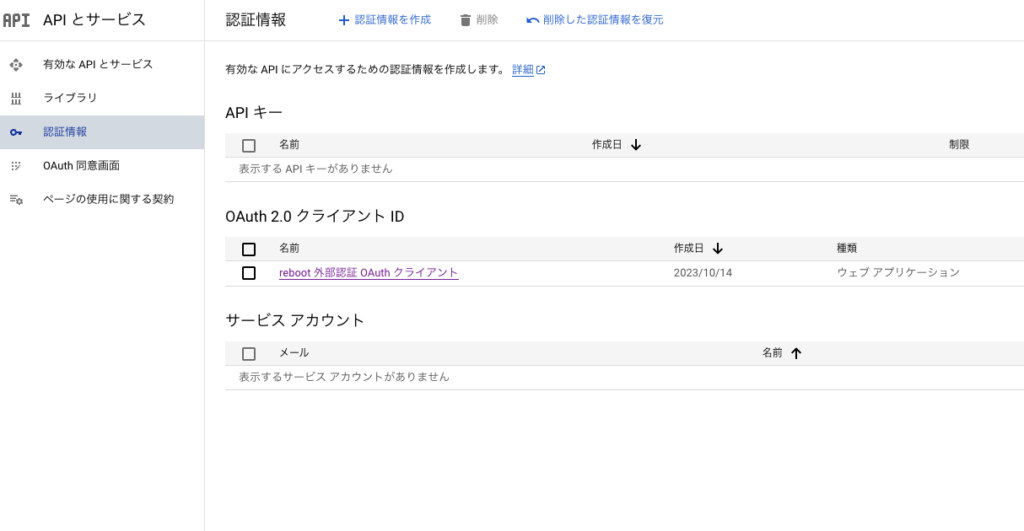
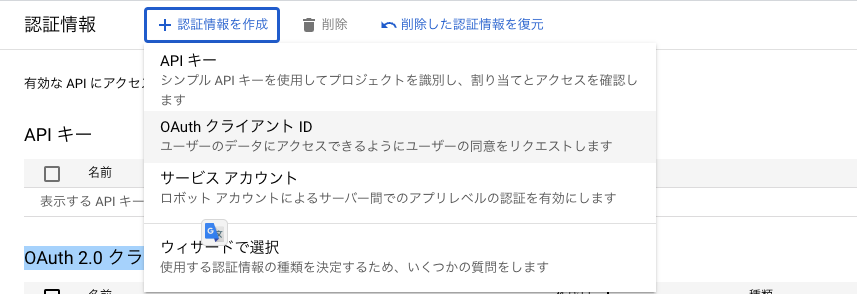
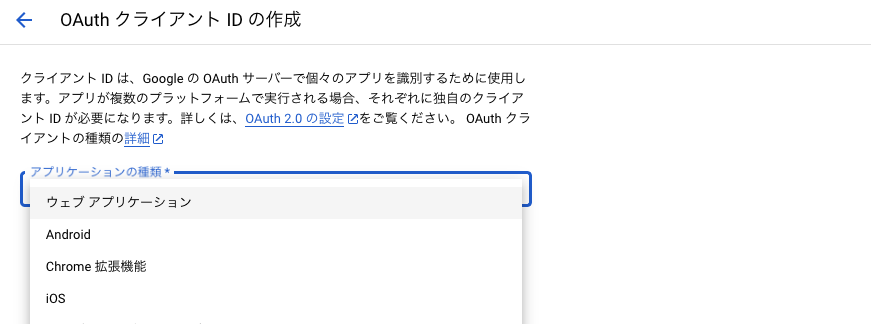
画面上部の「認証情報を作成」をクリックし、「OAuth 2.0 クライアント ID」を選択する。
アプリケーションの種類で「ウェブ アプリケーション」を選択する。
赤枠線の箇所をそれぞれ入力
- 承認された JavaScript オリジン
- 承認されたリダイレクト URI
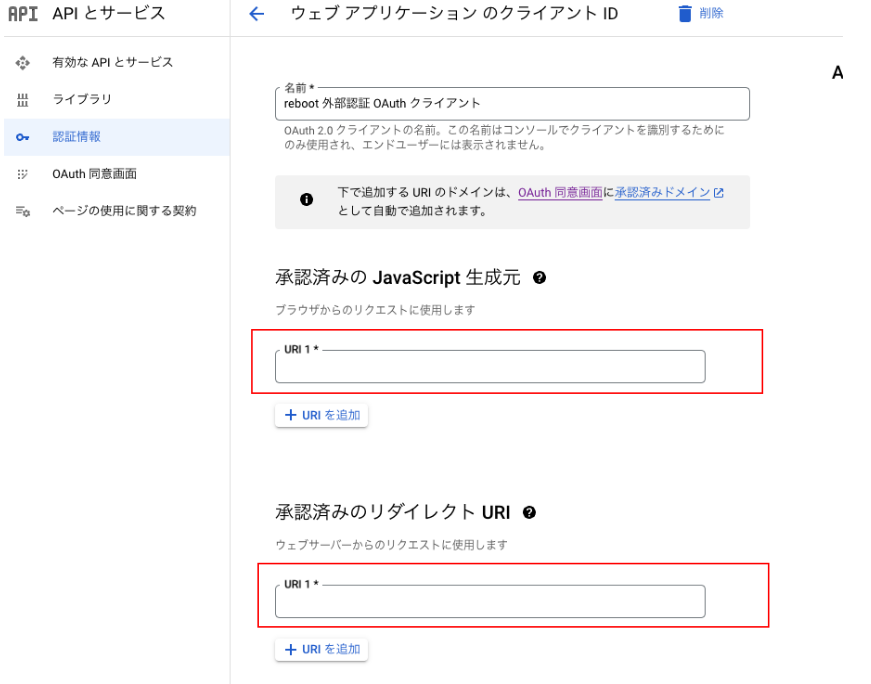
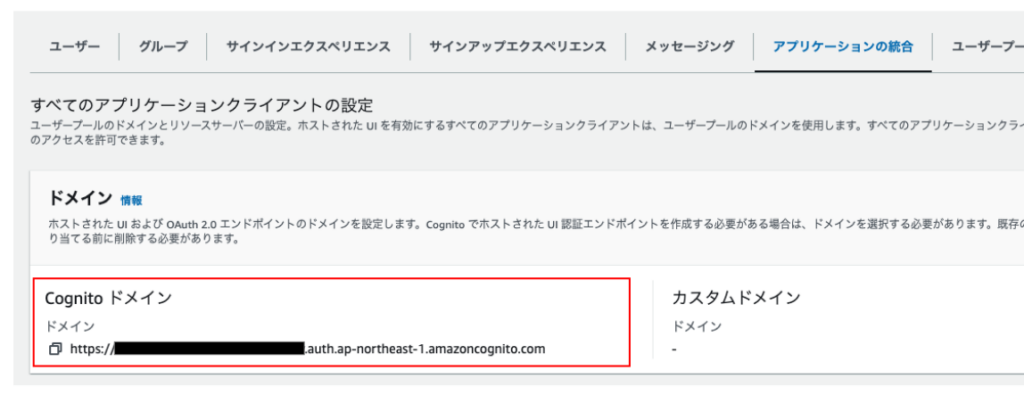
ドメインについては、「Amazon Cognito > ユーザープール > アプリケーションの統合」を選択し、Cognitoドメインに記載されているURIを入力する。また、「承認されたリダイレクト URI」については、[URI/oauth2/idpresponse]となるようにする。
認証エラー: An error was encountered with the requested page.
Google認証画面でメールアドレスとパスワードを入力して認証実行時に発生。
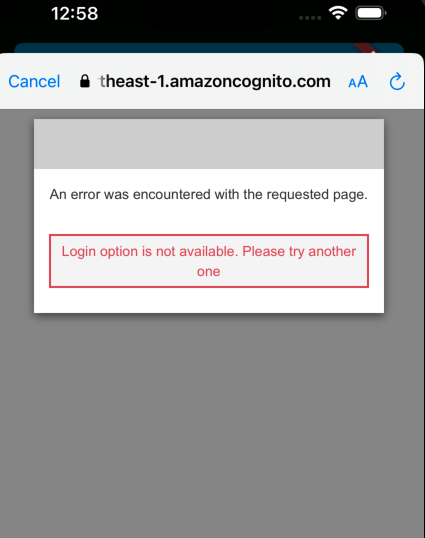
「an error was encountered with the requested page」と「Login option is not available. Please try another one」というエラーメッセージは、外部認証プロバイダーとの統合や設定に何らかの問題があることを示している。
解決法:
- Amazon Cognito > User pools(ユーザープール) > App integration(アプリケーションの統合) > App client list(アプリケーションクライアント)を選択。
- ホストされた UI(Hosted UI) > Editで以下のように設定する。
IDプロバイダーにGoogleを追加する。
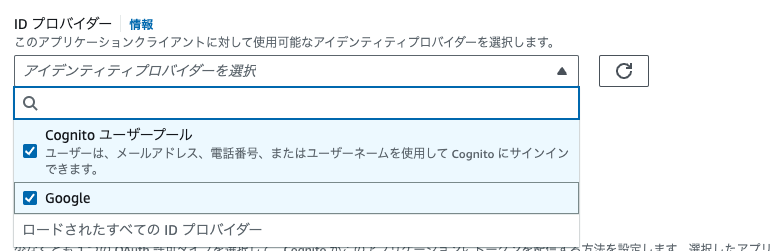
私は上記の設定でGoogle認証が完了した後に、アプリにリダイレクトされ、正常にログインができた。
以下のAWS公式YouTubeにて、CognitoとGoogle認証の設定手順が解説されており、この動画を見ることで設定の不足に気づくことができた。
LINE認証
LINE側の設定については以下を参照
スコープに emailを指定する場合、「メールアドレスの取得権限」の申請が必要。
https://developers.line.biz/ja/docs/line-login/integrate-line-login/#applying-for-email-permission
Amazon認証
Amazon認証を実行するにあたり、注意すべきポイント。
「developer account with Amazon」での設定
以下の公式ドキュメントの「Login with Amazon」タブの手順通りに設定を行う。
https://docs.amplify.aws/lib/auth/social/q/platform/flutter/#setup-your-auth-provider
Cognito側での設定
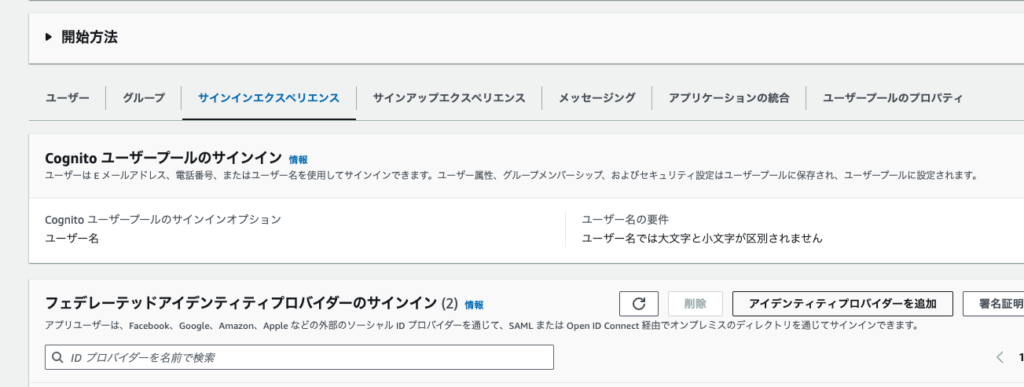
Amazon Cognito > ユーザープール > Sign-in experience(サインインエクスペリエンス) > Federated identity provider sign-in(フェデレーテッドアイデンティティプロバイダーのサインイン)にて、プロバイダーを追加する。
「developer account with Amazon」で作成した、「クライアントID:」並びに「クライアントシークレット:」の値を以下に入力する。
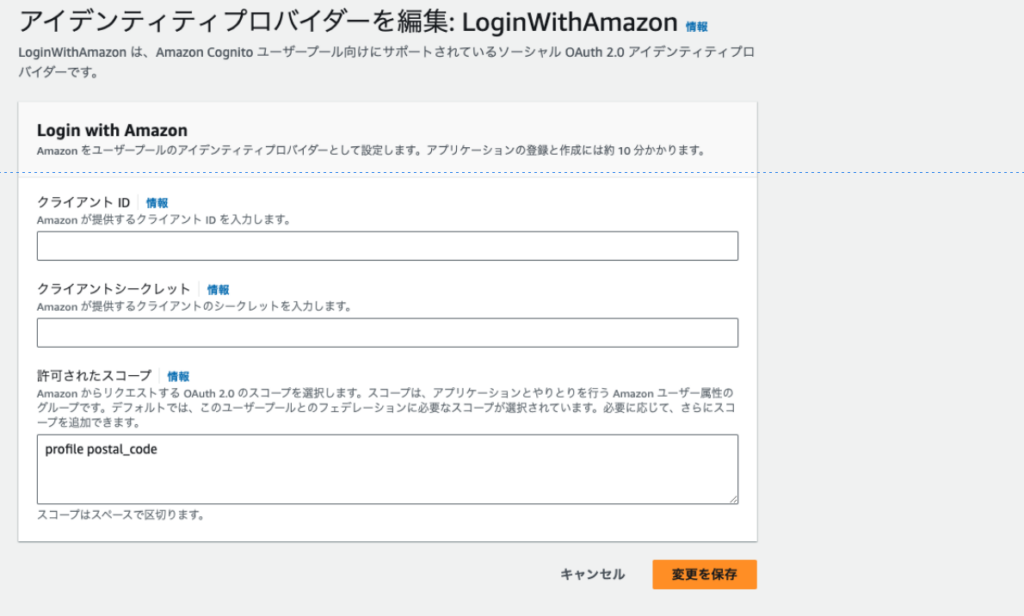
エラー: (invalidScope) An unknown scope was requested; error=invalid_scope
アプリ側でサインイン実行時に以下のエラーが返ってくる場合、Cognitoの設定に問題がある可能性がある。
Amazon Cognito > ユーザープール > Sign-in experience(サインインエクスペリエンス) > Federated identity provider sign-in(フェデレーテッドアイデンティティプロバイダーのサインイン)の許可されたスコープに指定する値が適切ではない可能性がある。
(invalidScope) An unknown scope was requested; error=invalid_scope私の場合はprofile postal_codeをスコープに指定することで、上記のエラーは解消された。
詳しくは、以下の公式ドキュメント 「ステップ 2: ユーザープールにソーシャル IdP を追加する」を参照する。
https://docs.aws.amazon.com/ja_jp/cognito/latest/developerguide/cognito-user-pools-social-idp.html